
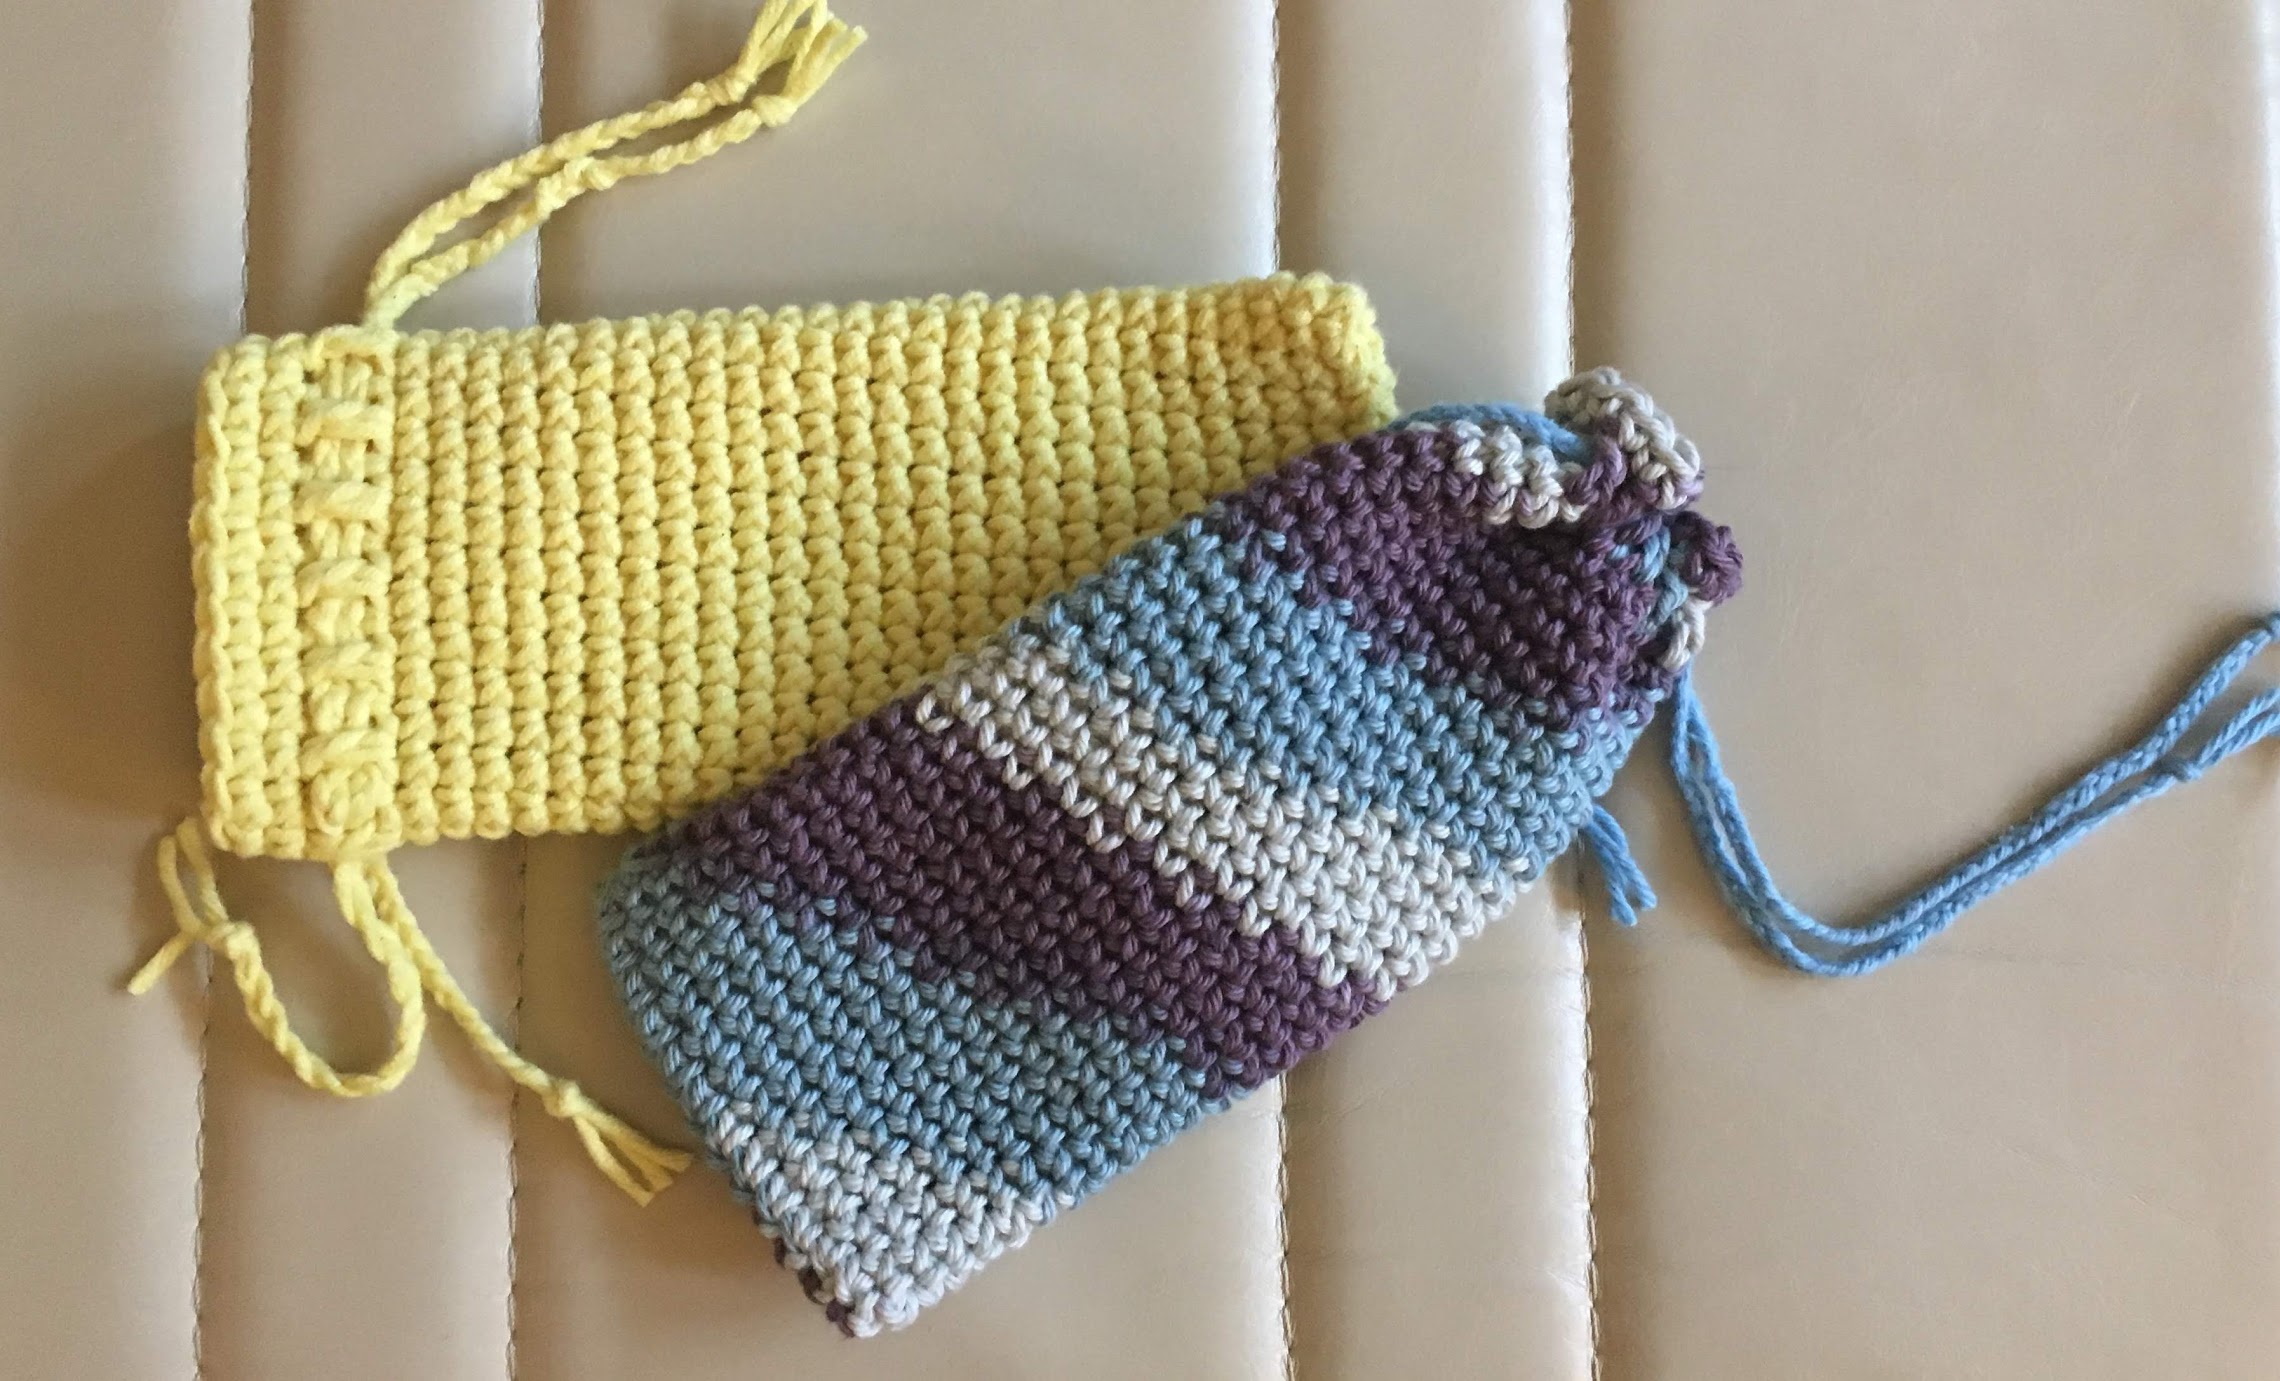
This glasses case is a quick and cute project that will keep your glasses from getting scratched in your purse or backpack. Find the free pattern below!
Cheap sunglasses have long been a necessity for me, because I have a bad habit of tossing them into backpacks, resulting in scratches all over the lenses. No more! I designed this fast, easy, and cute crocheted glasses case to protect my sunglasses, and I hope that it will save you a few pairs as well. 🙂
Materials
- 25-30 grams of worsted weight cotton yarn, about 50 yards (shown in Knit Picks Dishie and Rowan All Seasons Cotton)
- 4.5mm crochet hook
- yarn needle for weaving in ends
Pattern
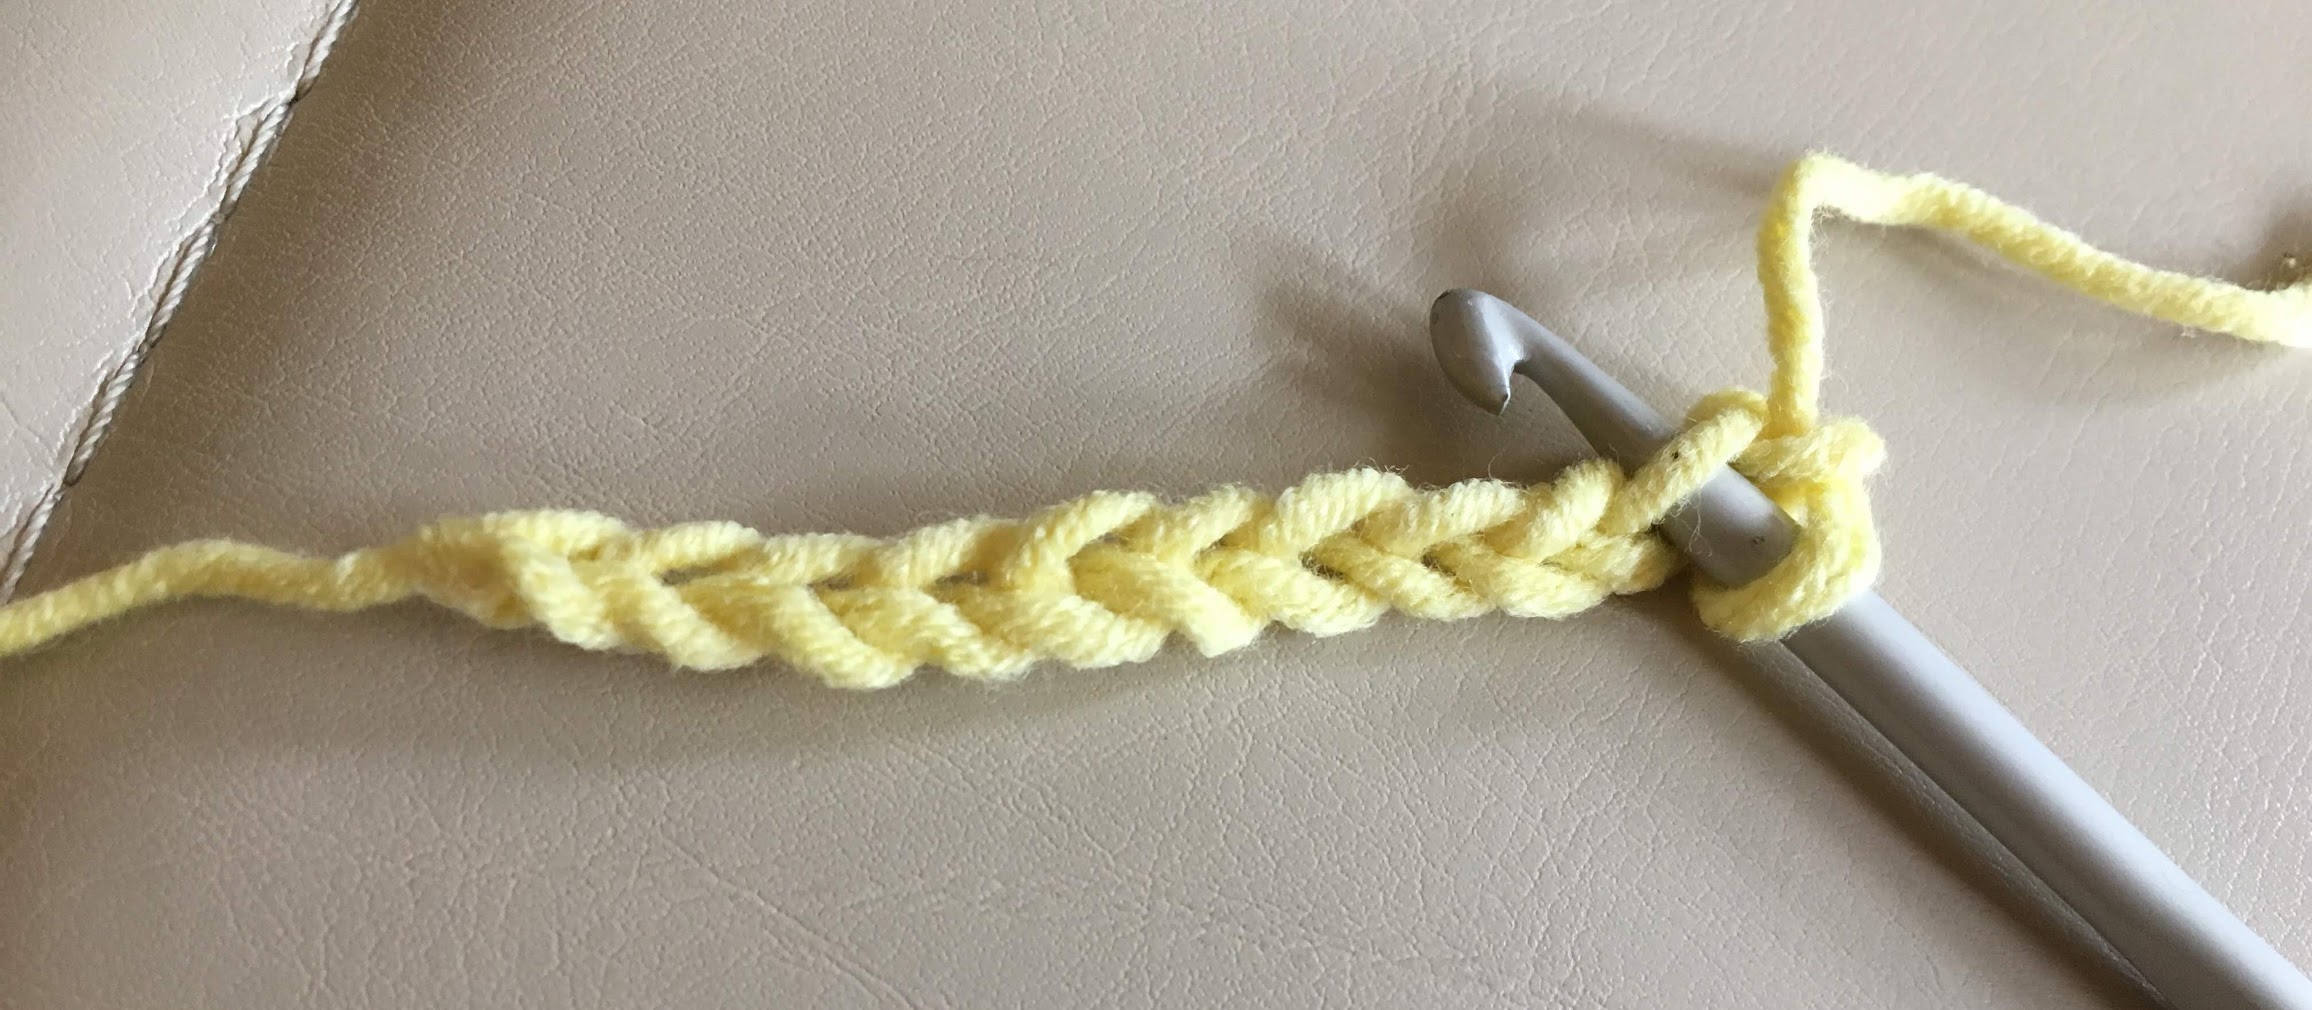
Ch. 13. Starting in second ch. from hook and working only into the BACK LOOPS of the chain, sc 11, then 2 sc in last st. The pic below has the wrong number of chains, but you can see where I’ve inserted the hook through only the back loop.
Next, rotate the chain 180 degrees so you’re working around the end and into the front loops of the same stitches. Sc 11, then 2 sc in last st (26 st total).
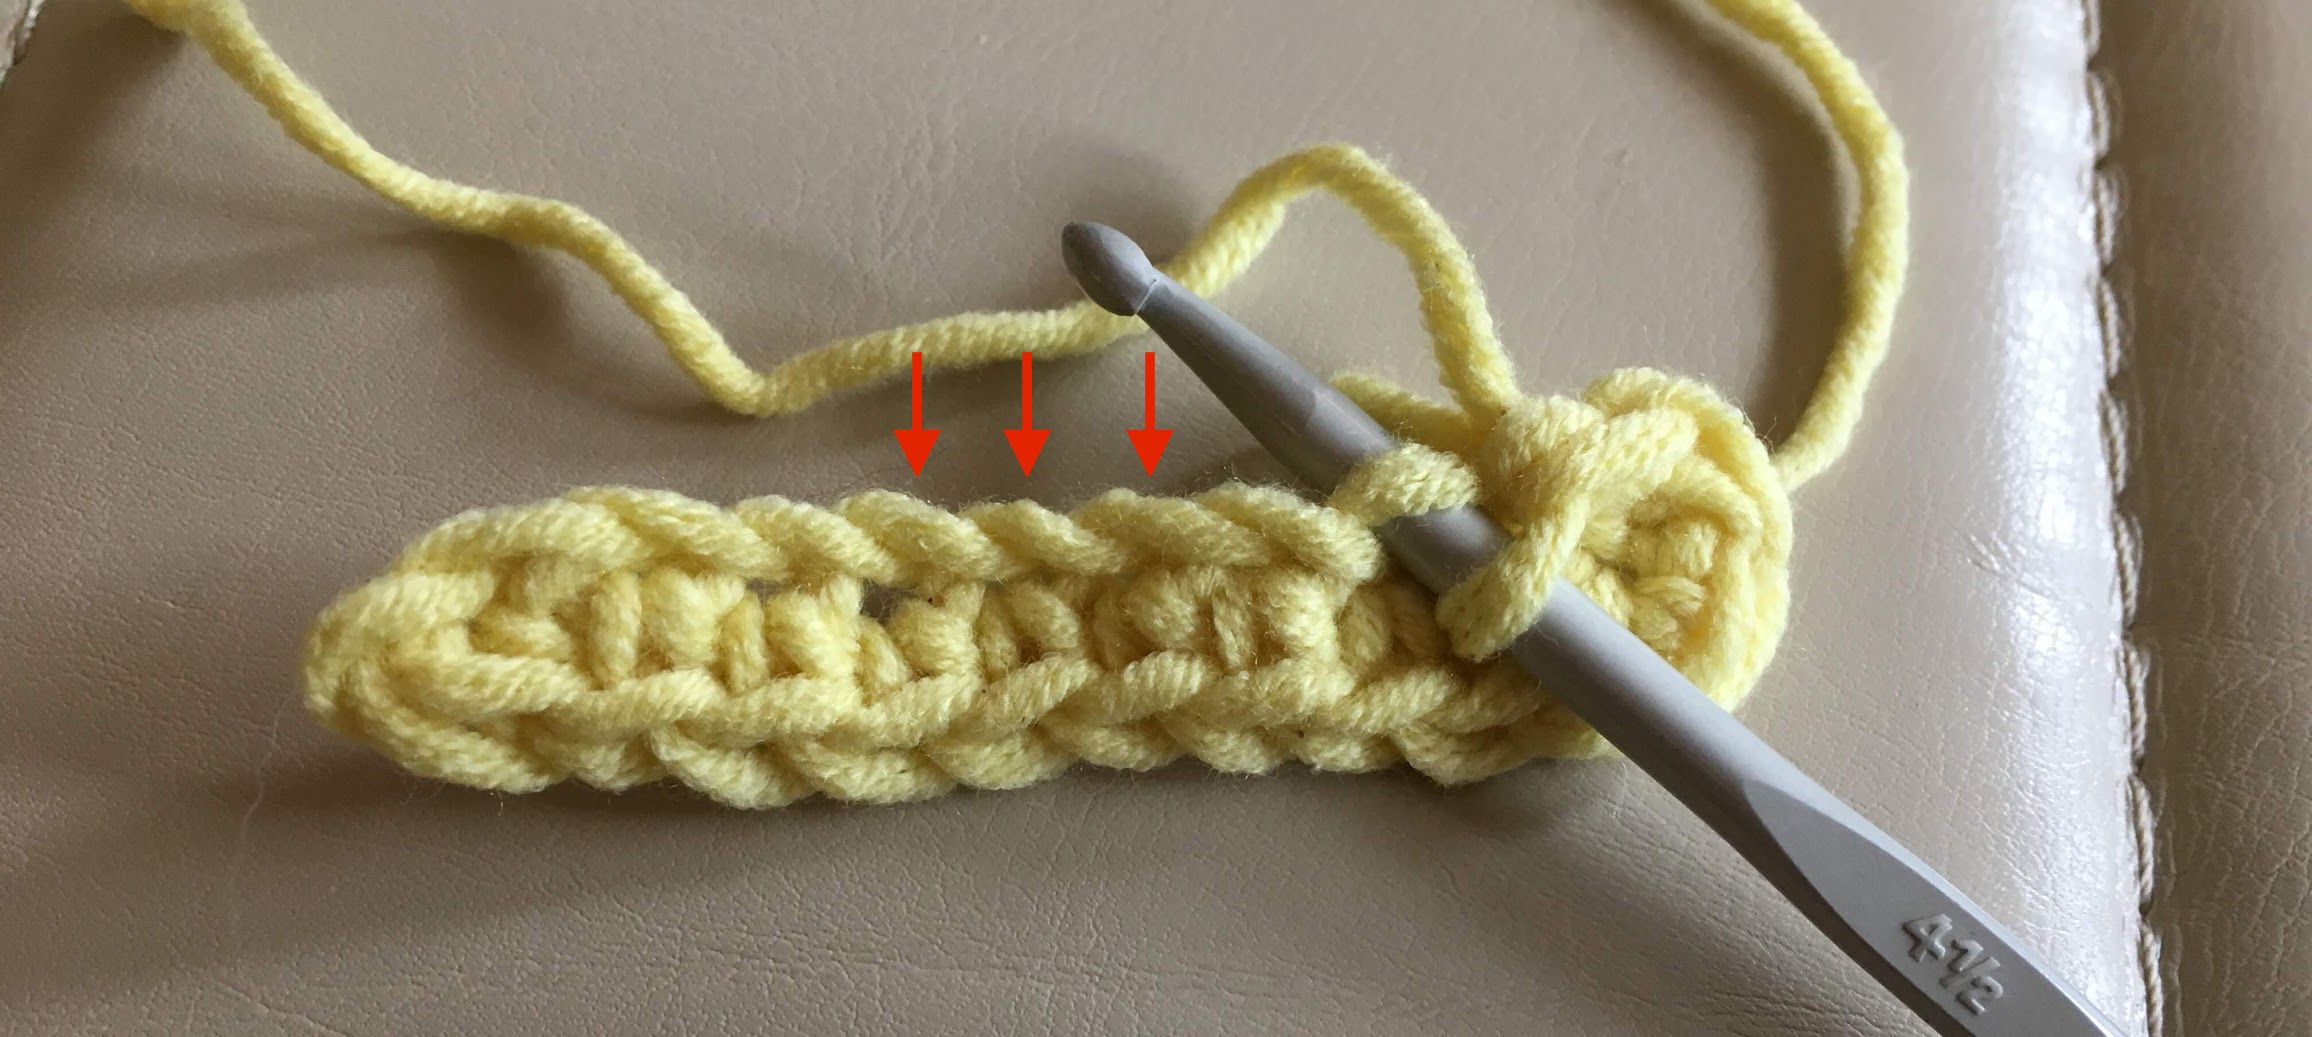
This is how your first round should look when you’re done:

Working around the chain creates a nice bottom edge of your case and lets us work in continuous rounds for the rest of the project.
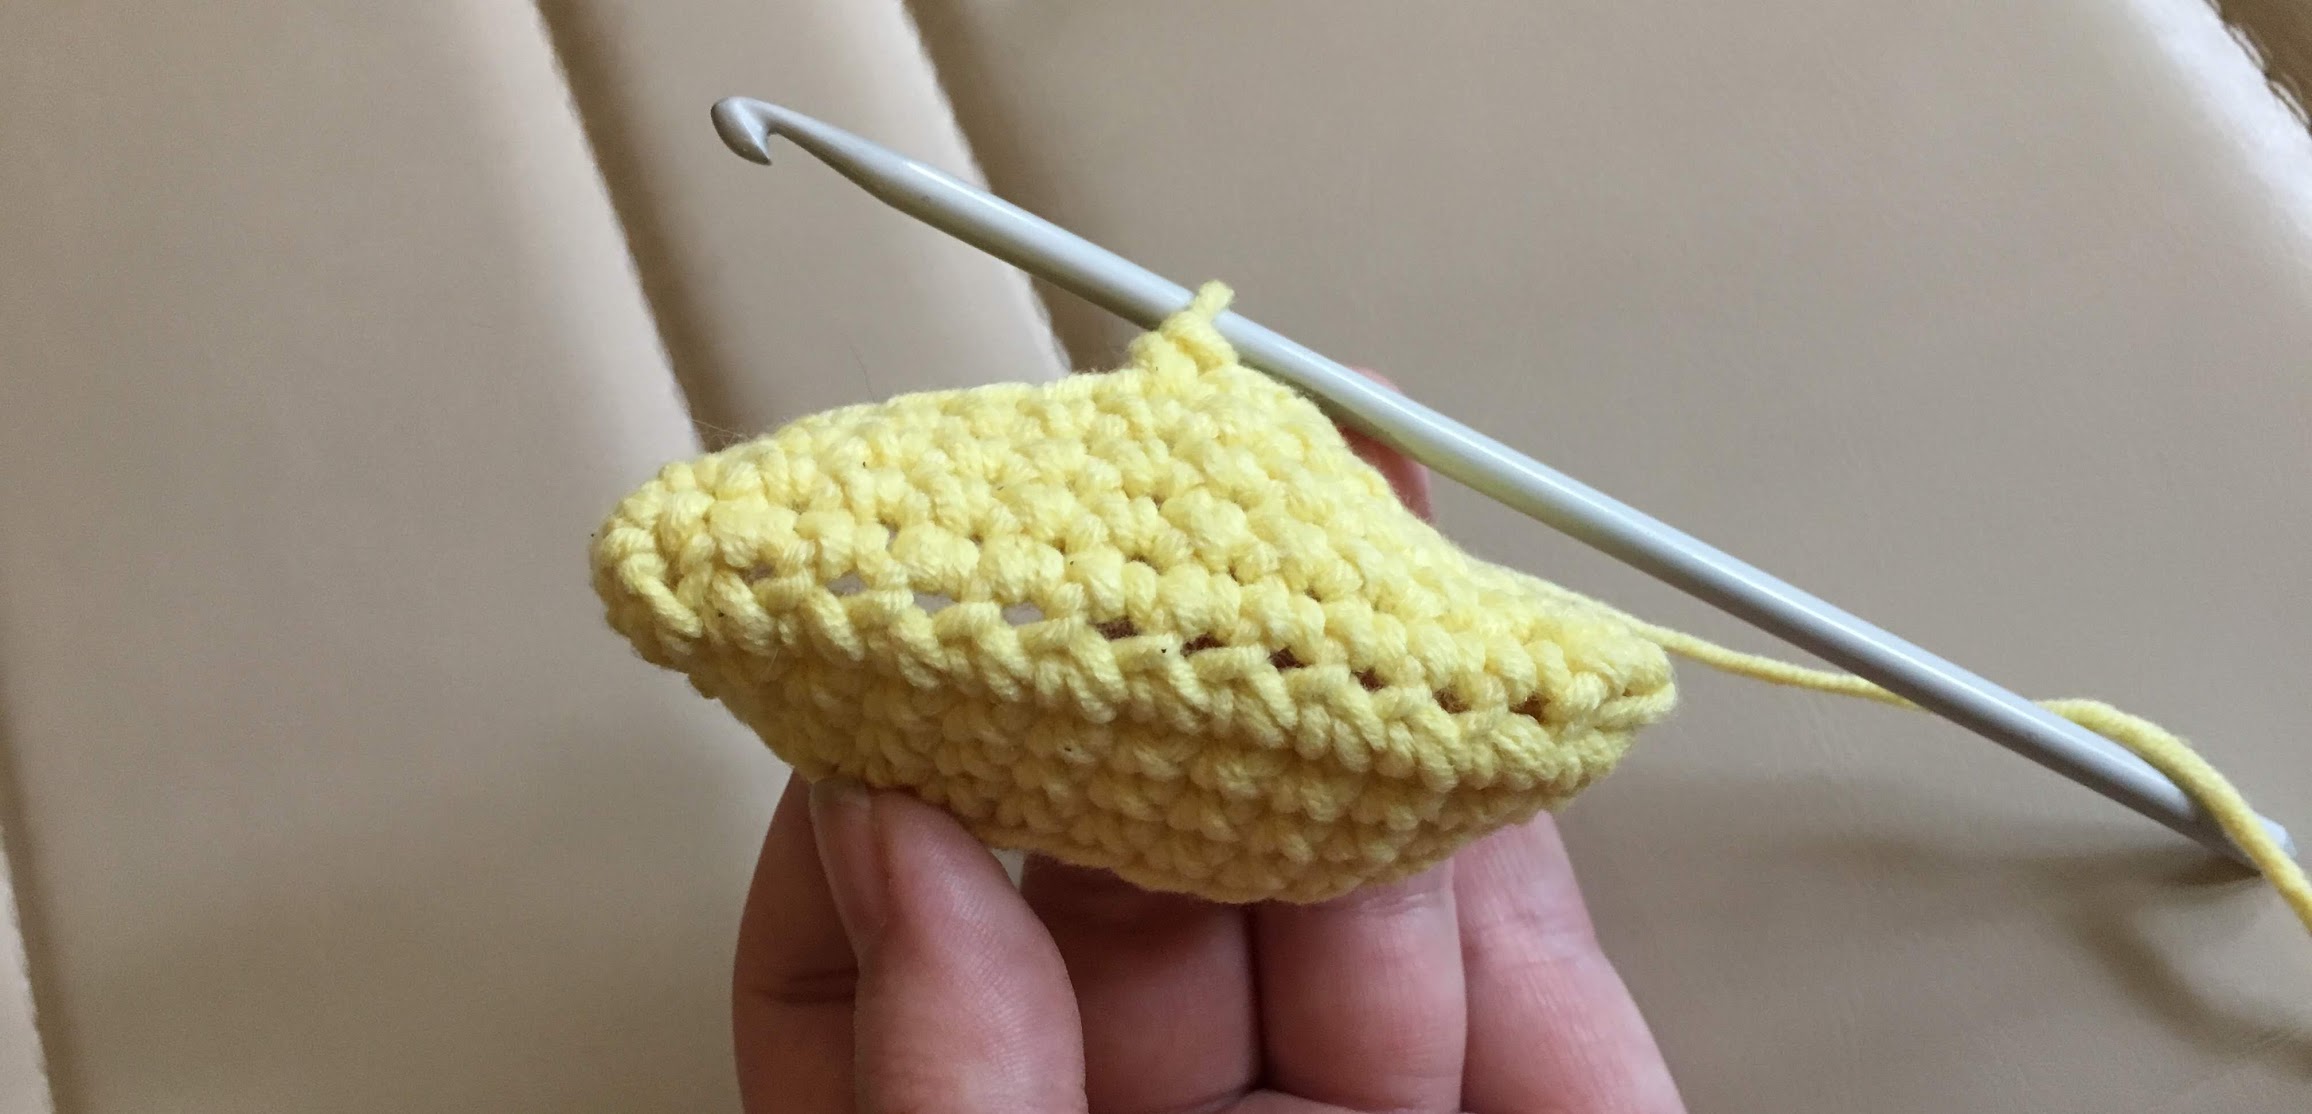
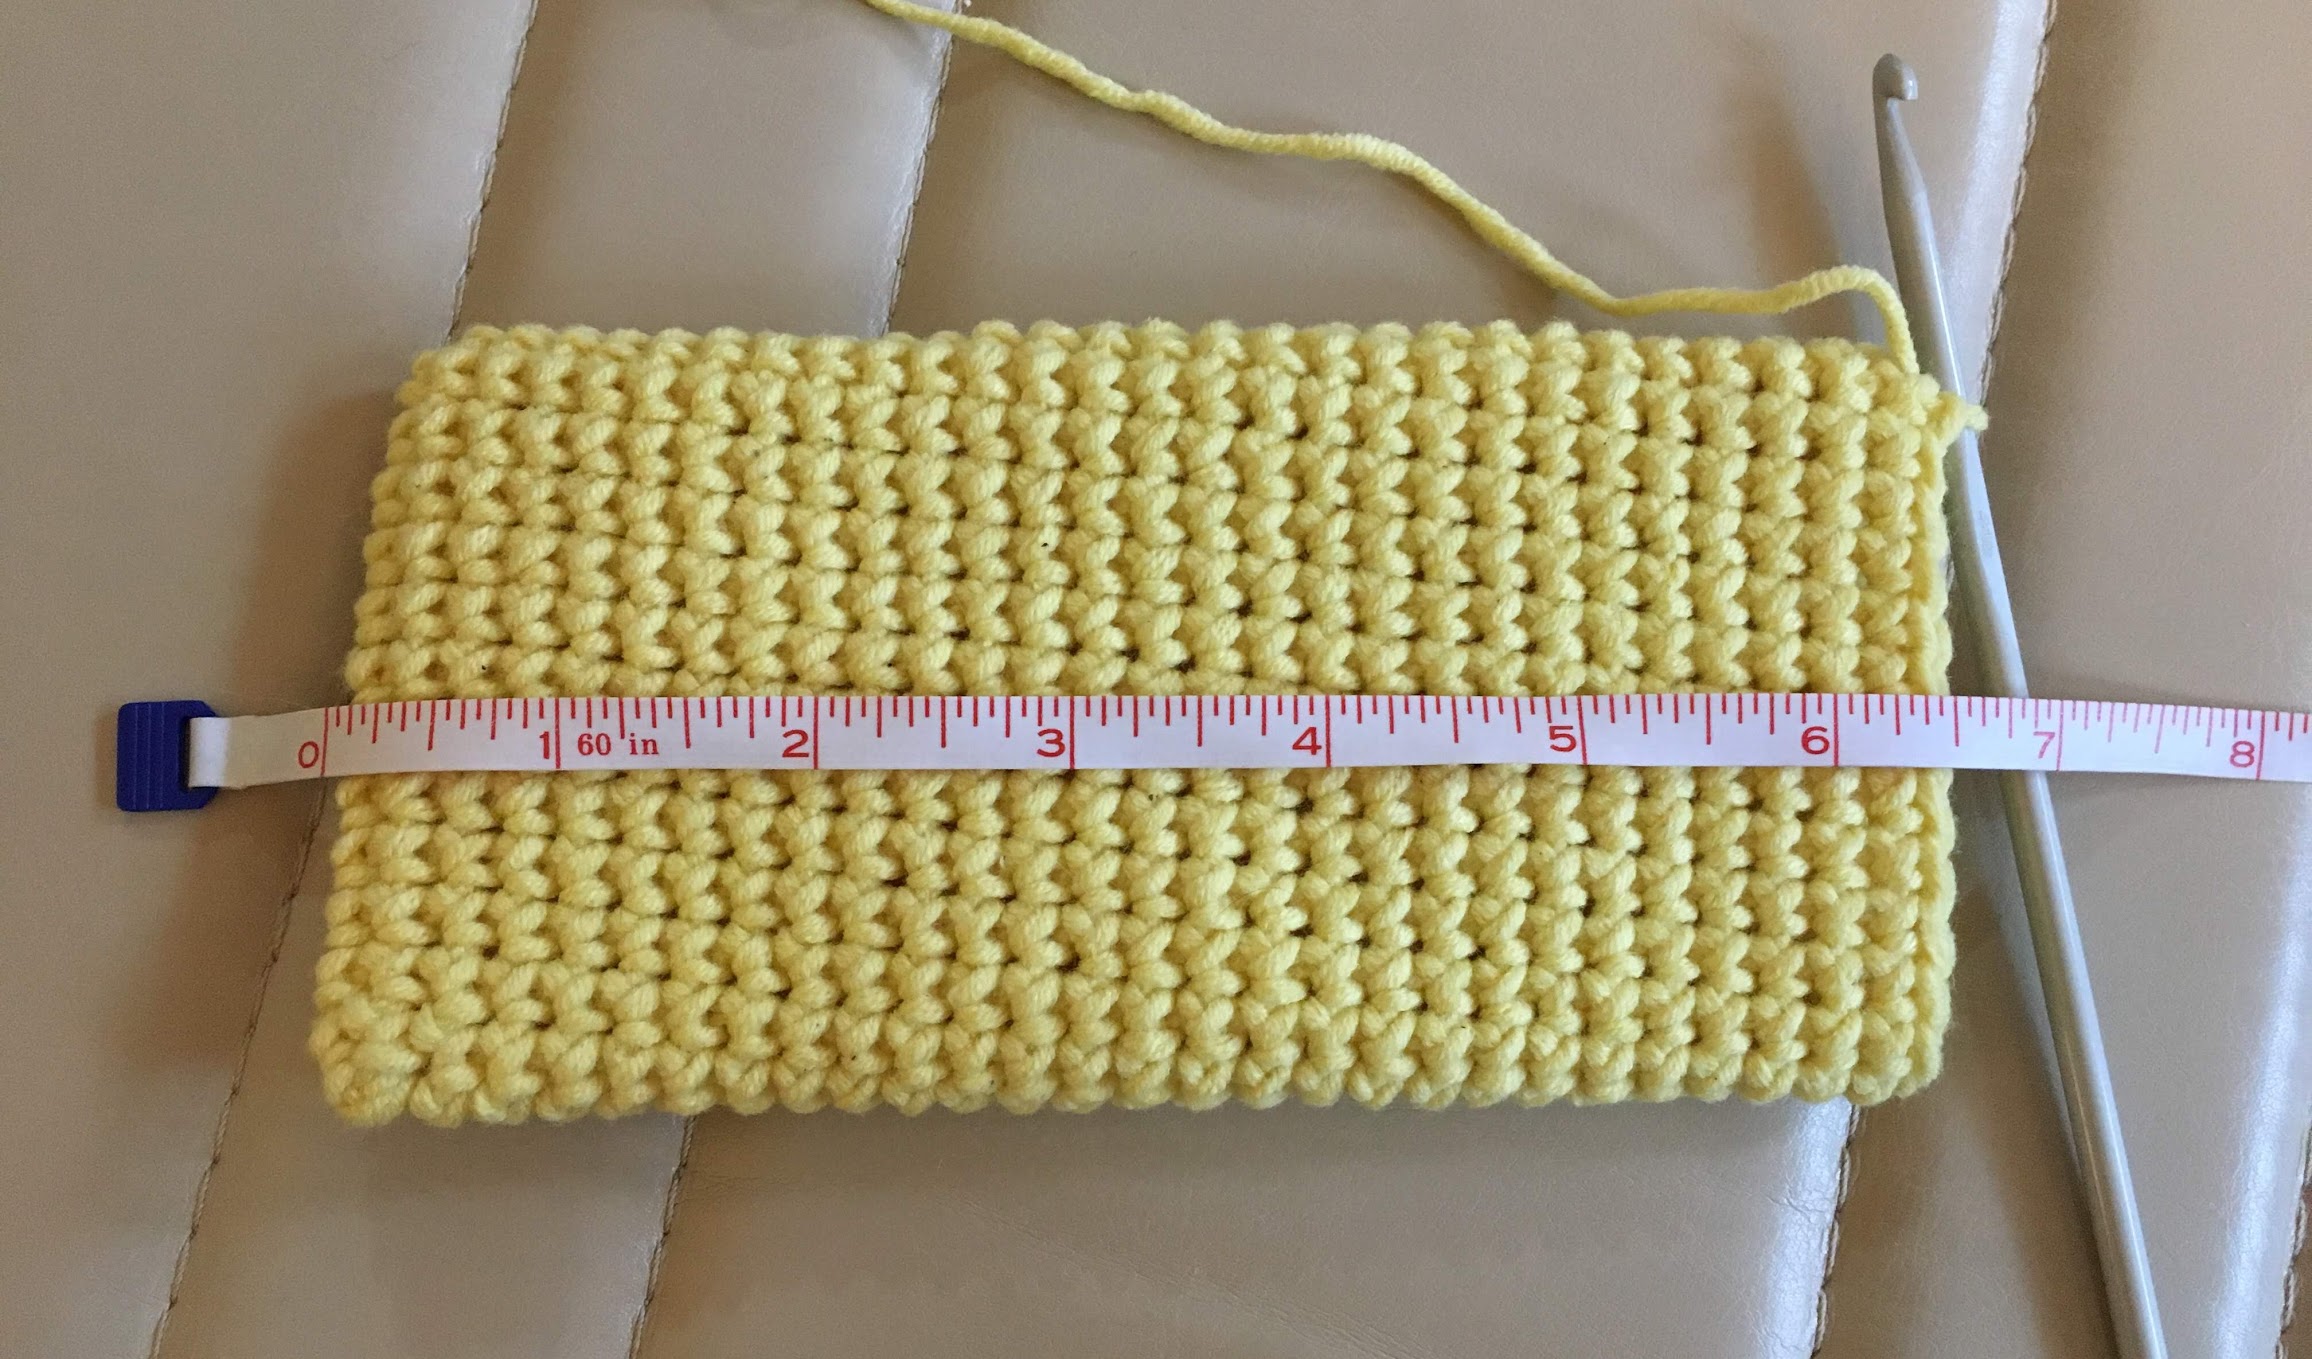
Now sc in each st around until your case is 6.5 inches long (or whatever your desired length below the drawstring is).
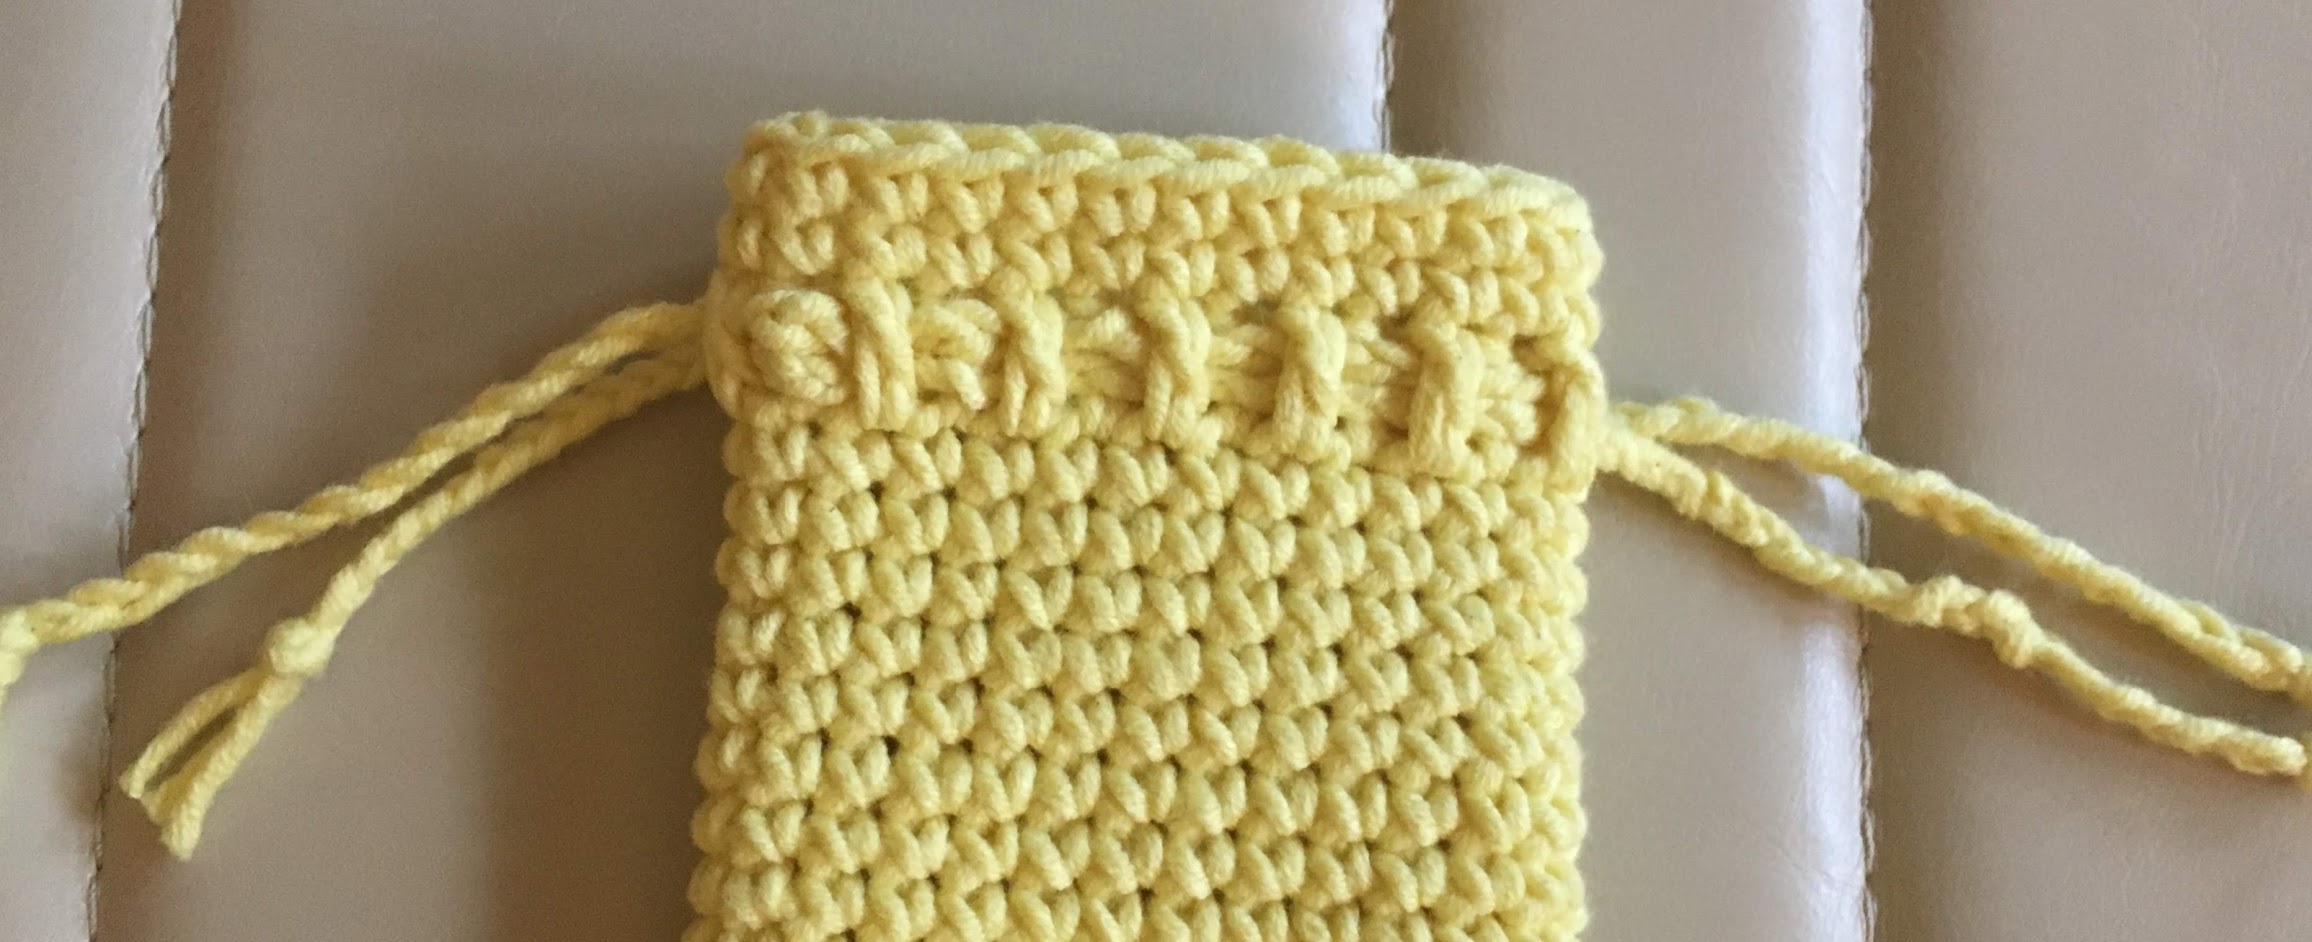
For the drawstring, we’ll work one round of dc stitches. Ch. 2 (counts as first dc), then dc 25. Sl st into the ch 2, then sc 2 more rounds, ending with a sl st into the next stitch. Fasten off. Using a few yards of your yarn, make 2 braids about 14 inches long. Thread each braid in between the dc stitches so that both ends of the same braid are on the same side of the case. So the ends of one braid are on the left, and the ends of the other are on the right.
Done! This glasses case is so quick to make, you could make dozens as holiday gifts. For other quick gift ideas, check out my Christmas Crafting post from last year or the small and adorable one-sitting pup. Happy crocheting!

I made two. The second one I am having problems stringing the braids?? I got the first one ok but not sure why I am having problems??
This project is perfect to do while watching a show or as a quick gift for christmas. I love it! My boyfriend asked specifically for this after I made one as a gift for my grandma. Definitely going to make one for myself too
I’m fairly new crocheter – when you say rotate 180 degrees, do you have a pic of that? Do I actually turn my work so I am working in the bottom of my original chain front loops? I’m sorry I hope I explained that?
Thanks, Dee
Thank you for the pictures , as a beginner they were a huge help!
How do you weave the braids into the case? I don’t quite understand that part. Thank you.
Hi again sorry I understand now please disregard my previous question!
I Love ❤️ this. Actually I used small pieces of scrap yarn I had and made a cute one. A good way to use those little pieces you get stuck with. Thanks for sharing
Just finished this thanks it was great
Great design. i successfully completed the eye glass pouch.Thank you for the pattern. Would love to see more variations of this
Wondering if the the stitches could be straight down columnar fashion. it is at a slight angle for me
Just made a case for my oversized sunglasses!! Love the pattern!
Are you crocheting in the round, or joining with slip stitch?
I just finished this, and I’m happy to say that it was my first ever crochet project! Thank you so much for this pattern and for making it clear and easy to understand. Even as an absolute beginner, I didn’t have any trouble at all with following the directions.
That’s so great! I’m glad you liked it. 🙂
Thank you so much for this pattern and I’m enjoying it so much
Hi! Did you single-crochet all the rounds into the back loop or the front loop?
Hello! After the first row where you work around both sides of the starting chain, all the remaining stitches are worked through both loops.
Hi! Sorry I’m confused about the drawstring part. I’m a beginner and I don’t quite understand how you go from the end of the pouch to the drawstring loops section?
I love the nice bottom edge this pattern gives!
This is a great pattern, thanks for sharing, How did you get the design on the blue eyeglass case in the photo so that the yarn colors were angled? By switching yarn colors? Thank you.
Hello, thank you so much! I used a self-patterning yarn, so the color changes naturally worked out that way. This yarn was “Dishie Multi” by KnitPicks in the colorway “Twilight.” So really, I got lucky that it came out like that. 🙂 But this pattern is a great one for color changing yarns!
This is such a great, easy to follow pattern. Thank you!
How do you make the braid? Please
Hello! I cut three pieces of the yarn I wanted to use, about 2 feet in length, and then used them to make a standard 3-strand braid like one might do with their hair. If it’s not something you’ve done before, I would recommend searching for “3 strand braid” or “basic braid” on Youtube, and you’ll definitely see many options for learning the technique. I knotted both ends of the braid to keep it from unraveling.
Such an easy and quick project that got me out of my crochet funk. I love little projects like this and I was so happy that it only took an hour or so. I had a couple issues at the beginning (I’ve never been good at counting stitches) but I continued through it and I love how it looks now. Thanks <3
So so glad you enjoyed the pattern and that it worked up quick for you! I am the same way — nothing is better to get me out of a crochet funk than something small and fast. 🙂
Thank you for sharing! Very new to crocheting and this was really easy for me to follow and worked up quickly!
Super cute design. Virtually hundreds of combinations can be done with this pattern. Thanks
Thank you! I just used your pattern to make my own case!! I made a few changes but appreciate the start!!
How d0 u weave the braid
Hello! I made the kind of standard 3-strand braid you would use for long hair but with 3 lengths of yarn, about 2 feet each. You lay the three yarn strands out next to each other, then alternate passing the one from the left into the middle, then passing the one from the right into the middle. If it’s not something you’ve done before, I would recommend searching for “3 strand braid” or “basic braid” on Youtube, and you’ll definitely see many options for learning the technique. I knotted both ends of the braid to keep it from unraveling.
After you weave the braid, how do you weave it into the stitches. With a needle?
I am brand new looking for a first project. How do I decipher the abbreviations in your pattern