
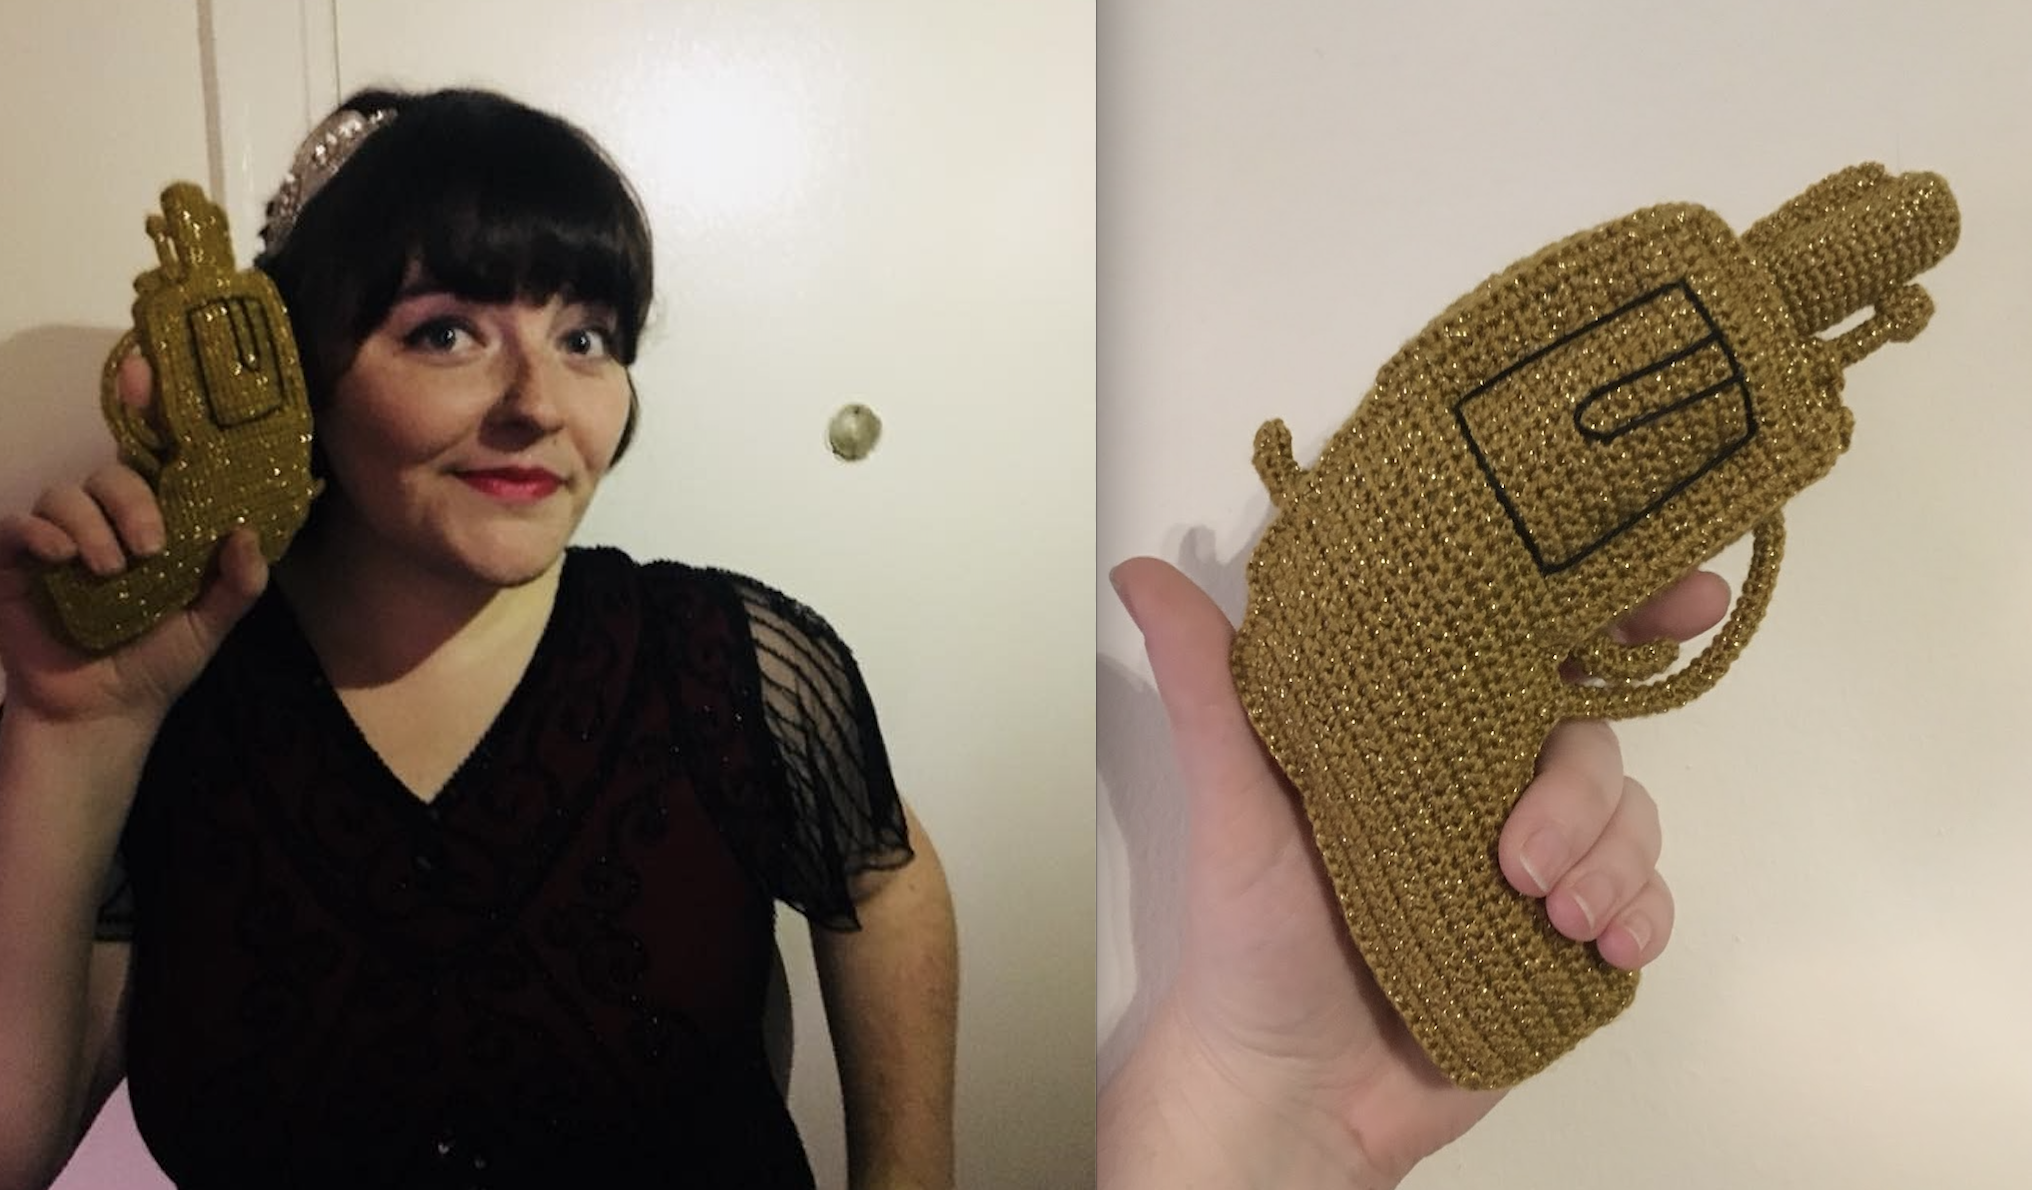
For Halloween this year, I crocheted my character’s most iconic accessory: Miss Fisher’s revolver!
My costume this year was Phryne Fisher from the fun and wonderful television series Miss Fisher’s Murder Mysteries. Miss Fisher is a lady detective in late 1920s Melbourne. Since my costume was easily misconstrued as flapper attire, I wanted to add a unique touch that would identify the specific character: Miss Fisher’s revolver.
There aren’t a ton of gun patterns out there (which is probably a good thing haha) so I decided to wing it. If you’d like to crochet your very own 1920s gold revolver, you can find my pattern notes below:
Supplies
2.0mm hook
Vanna’s Glamour yarn in Gold
Yarn needle
Frame – sides (make 2)
Ch. 19, then starting in 2nd ch from hook, sc across (18)
R2-20: Ch. 1, turn, sc across (18)
R21: Sc across (18), ch. 5
R22: starting in 2nd ch from hook, sc 4 in the chain, then sc 16, leaving 2 sts unworked (20)
R23: Ch. 1, turn, sc across (20), ch. 2
R24: starting in 2nd ch from hook, sc 1 in the chain, then sc across (21)
R25: Ch. 1, turn, sc across (21), ch. 16
R26: starting in 2nd ch from hook, sc 15 in the chain, then sc 20, leaving 1 st unworked (35)
R27-29: Ch. 1, turn, sc across (35)
R30: Sc 34, leaving 1 st unworked (34)
R31-33: Ch. 1, turn, sc across (34)
R34: Ch. 1, turn, sc 31, leaving 3 sts unworked (31)
R35: Ch. 1, turn, sc across (31)
R36: Ch. 1, turn, sc 30, leaving 1 st unworked (30)
R37: Ch. 1, turn, sc across (30)
Fasten off.
Frame – thin piece in between sides
Ch. 8, then starting in 2nd ch from hook, sc across (7)
R2-148: Ch. 1, turn, sc across (7)
Don’t fasten off. Sc the thin strip to both sides so that it’s in between the sides, remembering to stuff the piece when you get close to closing off the edges. For this, you’ll sc through both the thin piece along the edges, and the edge of one of the sides. Once you get all the way around one side, that should use up all of the stitches along one side of the thin piece. Then sc the short ends of the thin piece together, then go around the other side.
Barrel
R1: Sc 6 in magic ring (6)
R2: Sc 2 sts in each st around (12)
R3: (2 sc in next st, sc 1) 6x (18)
R4: In BLO sc around (18)
R5: Sc 14, invdec 2x (16)
R6-18: sc around (16)
Fasten off. Sew barrel to the wider end of the frame.
Embroider the outline of the cylinder onto the frame with black yarn or thread. I also took a length of gold yarn and sewed through both sides at the edges of the cylinder outline to pull the edges in, so the cylinder shape bulges out from the rest of the frame.
Trigger
Ch. 8, then starting in 2nd ch from hook, sc across (7)
Ch. 2, dc 2, hdc 2, sc 3 (7)
Ch. 1, sc across (7)
Fasten off, then sew the trigger to the bottom of the gun.
Trigger Guard
Ch. 23, then starting in 2nd ch from hook, sc across (22)
R2-3: Ch. 1, turn, sc across (22)
Fasten off, then whipstitch the two long sides together and sew onto the bottom of the gun around the trigger.
Sight
Ch. 10, then starting in 2nd ch from hook, sc 4, hdc 2, dc 2, hdc 1 (9)
Fasten off and sew to top of the barrel.
Hammer
Ch. 6, then starting in 2nd ch from hook, sc across (5)
R1: Ch. 2, dc 1, hdc 2, sc 2 (5)
R2: Ch. 1, sc across (5)
Fasten off and sew to the back of the gun, opposite the barrel.
Ejector Rod & Crane (optional)
I think this piece makes the gun really look like Miss Fisher’s revolver, but it would still look great without it, and it’s a little fiddly to put together. Feel free to skip it if you want!
Ch. 10, then starting in 2nd ch from hook, sc across (9)
R2-3: Ch. 1, turn, sc across (9)
Fasten off, whipstitch the two long sides together into a cylinder.
Tip: Ch. 3, then starting in 2nd ch from hook, sc across (2).
R2-6: Ch. 1, turn, sc across (2). Fasten off, wrap the rectangle around the tip of the cylinder you just made, and whipstitch the ends together.
Crane: Ch. 3, then starting in 2nd ch from hook, sc across (2).
R2-20: Ch. 1, turn, sc across (2)
Sew one end of the rectangle around the other tip of the cylinder, leaving one long end of the rectangle. Roll that end into a small cylinder, then sew the whole piece to the bottom of the barrel on the gun.
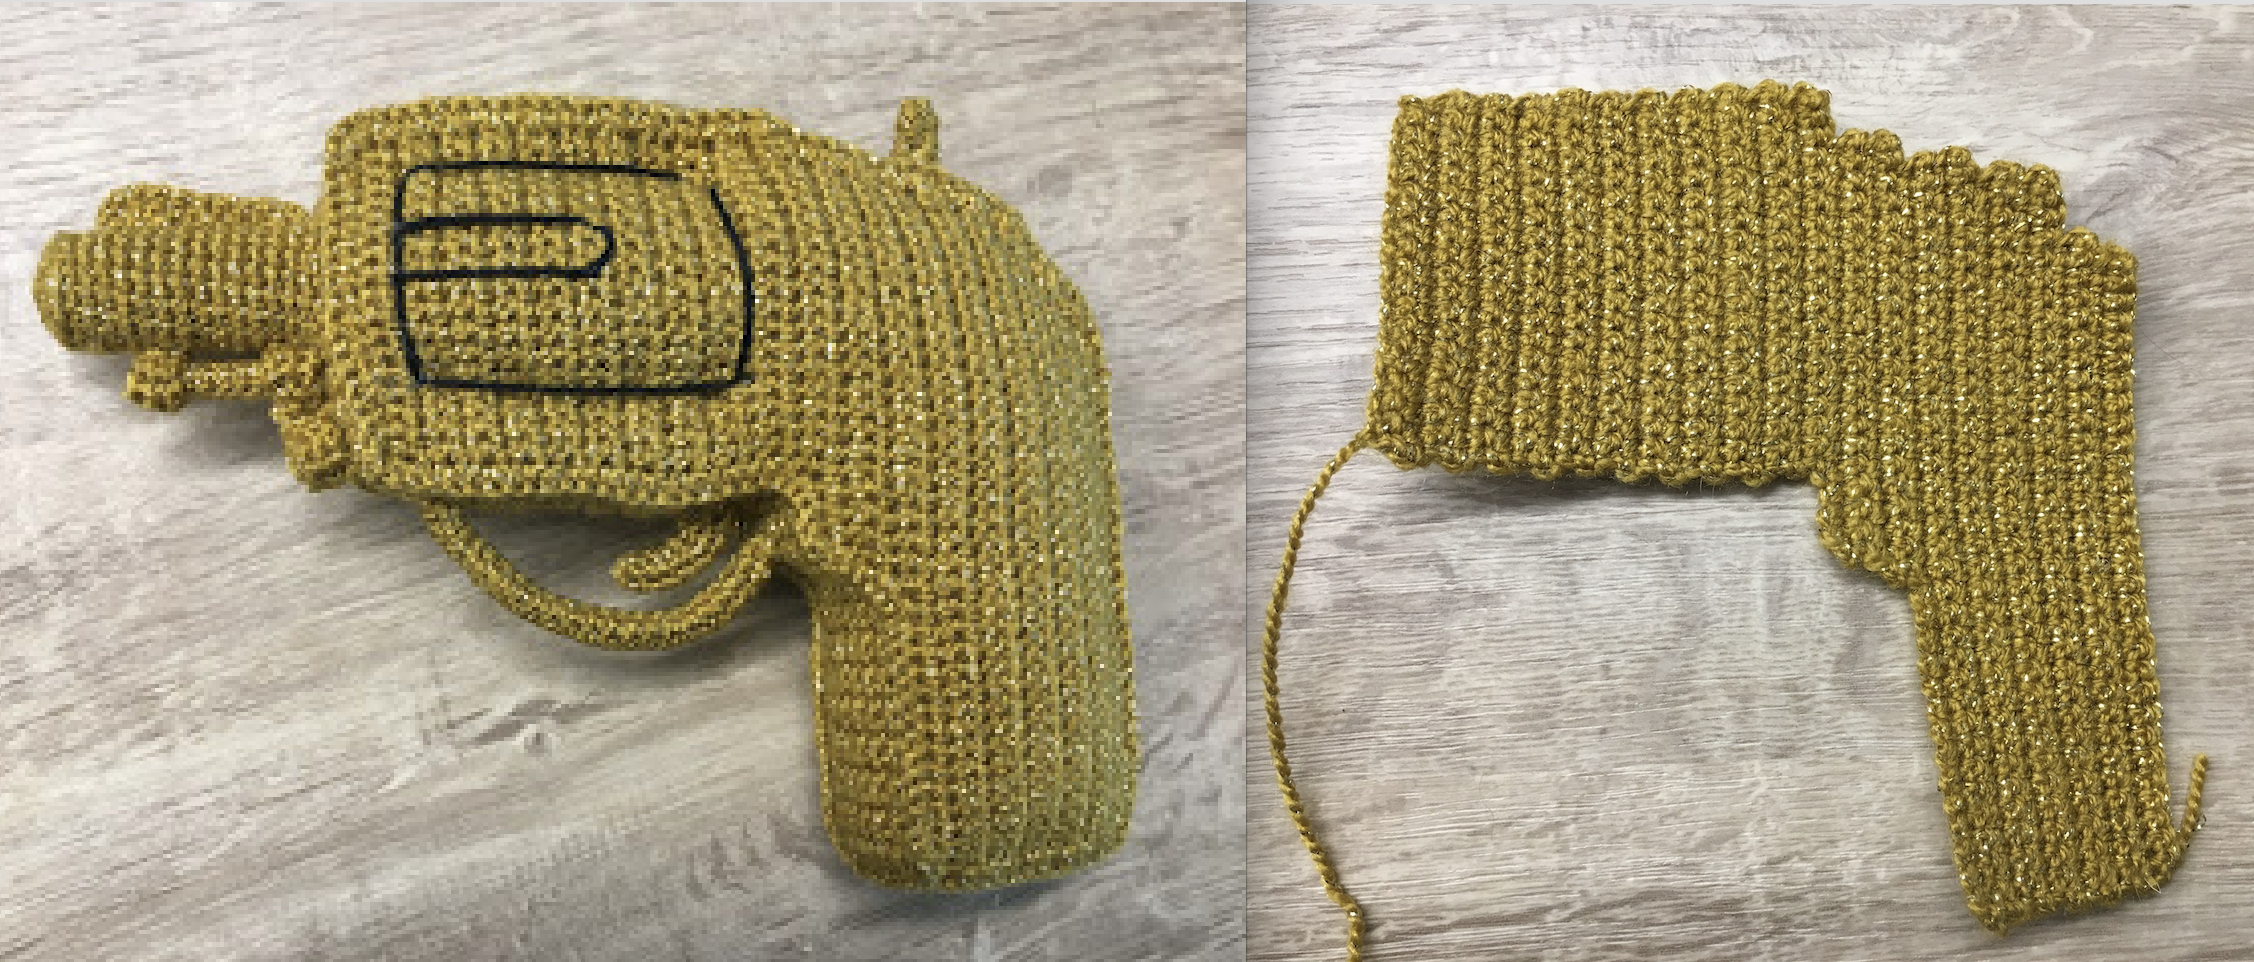
A few more pictures to help with placement of the various pieces:
Have you crocheted part (or all?!) of a costume before? It’s so fun to use these skills for an interesting touch or unique accessory. Happy Halloween!